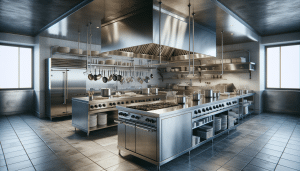
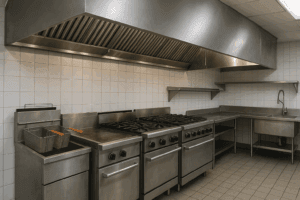
Cooking can be a joyous experience, filling your home with delightful aromas. However, behind every culinary adventure lies the unsung hero: your kitchen hood ventilation. Without proper maintenance, Grease and grime can build up, leading to potential hazards. At Utah Hood Cleaning, we understand the importance of a clean and efficient kitchen hood ventilation system. Dive into our step-by-step guide to keep your hood in top shape, ensuring a safer and fresher kitchen environment just for you.
Understanding the Importance of Kitchen Hood Cleaning
Regular cleaning of your kitchen hood is more than just a good housekeeping habit. It’s crucial for maintaining the efficiency of your kitchen’s ventilation and keeping unwanted odors at bay. A clean hood helps in reducing fire hazards, ensuring your cooking space remains safe for every member of your household. Plus, it plays a major role in enhancing the quality of the air you breathe while cooking. If these benefits resonate with you, read on to learn how you can master this essential home maintenance task.
Furthermore, when your kitchen hood is free from greasy build-up, it works at peak performance. This ensures that all the smoke, steam, and heat generated from cooking are effectively vented out. Consequently, your kitchen remains cooler and cleaner, which is always a win. Cleaning your hood regularly not only extends its lifespan but also improves its effectiveness in capturing unwanted particles.
Gathering Your Cleaning Supplies
Before embarking on your kitchen hood cleaning journey, gather all the necessary supplies to make the process smooth and efficient. Start with a reliable degreaser; it will be your best friend in breaking down stubborn grease. Have some microfiber cloths or sponges ready for gentle yet effective cleaning. Don’t forget to equip yourself with a soft-bristle brush to reach those tricky corners and crevices.
Moreover, safety should always be a priority. Invest in a pair of sturdy rubber gloves to protect your hands from harsh chemicals. Additionally, a good kitchen hood cleaning also requires the right cleaning solution. Depending on your preference, you can use either Commercial cleaning agents or homemade solutions like vinegar and baking soda. Now, with your cleaning arsenal ready, it’s time to get to work.
Preparing Your Kitchen Space
Preparation is key when it comes to cleaning your kitchen hood ventilation. Start by ensuring your stovetop is turned off and completely cooled down. Remove any pots, pans, or cooking utensils to give yourself ample space to work freely. It’s just like setting the stage for a performance – you want your space uncluttered and safe for action.
Next, cover the cooking area with a drop cloth or old newspaper. This not only protects your stovetop from any cleaning splatters but also saves you the hassle of additional cleanup. By creating a well-prepared environment, you’re setting yourself up for a successful and stress-free cleaning procedure.
Disassembling the Hood Filters
Kitchen hood filters are at the forefront of defense against airborne grease and particles. To start, locate the Filter – most hoods have a straightforward mechanism for easy removal. Gently slide or unclip the filters, ensuring you avoid any rough handling that could lead to damage.
Once removed, assess the extent of grime and grease accumulated on them. Don’t be surprised if they appear murkier than you’d imagined. Recognizing this buildup is the first step in addressing it efficiently. Now that the filters are out, it’s time to get them sparkling clean again.
Cleaning the Hood Filters
Now comes the part where rubber meets the road, or in this case, grease meets the cleaner. Here’s how you can rejuvenate those filters:
- Soak in Hot Water: Begin by submerging the filters in hot, soapy water. This will help loosen the stubborn grease stuck onto the surface.
- Apply a Degreaser: Spray or pour a generous amount of degreaser onto the filters. Allow the solution to sit for a few minutes to penetrate and break down the grime.
- Scrub Thoroughly: Using your soft-bristle brush, scrub the filters with care. Pay extra attention to areas with a thicker buildup for comprehensive cleaning.
- Rinse and Dry: After scrubbing, rinse the filters thoroughly in warm water to wash away any residual grease and cleanser. Let them air dry completely before reinstalling.
- Inspect for Damage: As a final step, inspect each filter for signs of wear or damage. If they seem too worn out, it might be time to replace them with new ones.
Cleaning the Hood Exterior
The exterior of your kitchen hood requires some TLC as well. Start by dampening a microfiber cloth with a suitable cleaning solution. Gently wipe the surface, working in small sections for thorough cleanliness. Pay close attention to greasy spots that might need a little extra elbow grease.
Remember to avoid abrasive materials or harsh chemicals on the hood’s exterior to prevent any damage. For stainless steel hoods, a vinegar-water solution can effectively remove smears and fingerprints. Once cleaned, buff the surface with a dry cloth to reveal a shiny, polished finish, making your hood look as good as new.
Cleaning the Hood Interior
Cleaning the interior of your kitchen hood can seem daunting but rest assured, it’s entirely manageable. Start by examining the fan blades; they often accumulate a fair share of grime. Use a degreaser and soft cloth to meticulously clean each blade, ensuring not to disturb their alignment.
Delve deeper to clean the hood’s interior walls and nooks. These areas are prone to capturing more stubborn grease. Make sure you clean them thoroughly to prevent odor buildup and maintain effective suction. With a little persistence, the inside of your hood will be as clean as the outside.
Reassembling Your Kitchen Hood
With all parts clean and gleaming, it’s time to put everything back together. Begin with the filters, ensuring they are completely dry before reattachment. Slide or secure them into place, making sure they are correctly positioned to function efficiently.
Once the filters are securely back in place, do a final check. Confirm that all components are assembled correctly and that nothing was left out. Reassembling marks the culmination of your cleaning task, bringing your kitchen hood back to optimal performance.
Testing Your Cleaned Hood Ventilation
Congratulations on successfully cleaning your kitchen hood! Before you start cooking up a storm again, a quick performance check is key. Turn on the ventilation system to ensure everything is working in harmony. Listen for any unusual noises or vibrations that could indicate a need for further adjustment.
If everything sounds and looks great, your hood is ready to sail through another round of culinary adventures. A clean hood not only beautifies your kitchen but also ensures a healthier cooking experience. Enjoy the peace of mind that comes with knowing that your kitchen environment is safer and your ventilation system, fully effective.
Contact Us for Professional Hood Cleaning Services
There you have it! While it’s absolutely possible to manage your kitchen hood cleaning on your own, sometimes it’s nice to let professionals handle the job. At Utah Hood Cleaning, we take pride in offering top-tier cleaning services to keep your kitchen environment spotless and safe. Whether you need a thorough deep clean or routine maintenance, reach us by phone at 801-853-8155 or Request a Free Quote today.


