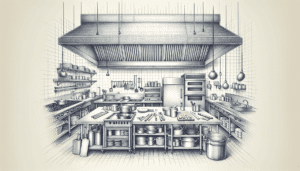
Let’s be real for a second. There is nothing—and I mean nothing—more overwhelming in a Commercial kitchen than staring up at a greasy, dripping Exhaust hood and knowing it needs to be cleaned. It’s that sticky, yellow-brown film that seems to coat everything just by looking at it. If you manage a restaurant here in Salt Lake City, you know exactly the feeling I’m talking about. It’s not just about aesthetics; it’s about safety, airflow, and keeping the health inspector happy. But mostly, it’s about making sure your kitchen doesn’t catch on fire. Grease is fuel, plain and simple.
You might be thinking about tackling this yourself. Maybe you’ve got a slow Tuesday, a couple of strong line cooks with some downtime, and a pressure washer you bought at the hardware store. It sounds doable on paper. But honestly? It’s a beast of a job. It’s messy, it requires chemicals that can burn your skin, and if you don’t do it right, you leave hidden grease in the ductwork that can ignite later. But hey, if you are determined to give it a go, or if you just want to understand what actually happens when the pros come in, I’m going to walk you through it. Step by painstaking step.
Is It Worth Doing Yourself?
Before we get the ladders out, let’s have a frank conversation about expectations. Cleaning a hood isn’t like wiping down a countertop. It is industrial cleaning. We are talking about NFPA 96 standards—that’s the National Fire Protection Association code that governs ventilation control and fire protection. If you miss a spot, especially up in the ductwork or on the rooftop fan, you aren’t just leaving dirt behind; you’re leaving a fire hazard.
Most restaurant owners in Utah eventually realize that the cost of supplies, the labor hours, and the risk involved usually outweigh the price of hiring a professional service. Plus, professionals provide a certification sticker that keeps the fire marshal off your back. But knowledge is power, right? Even if you hire someone, knowing the process helps you spot a lazy job. So, let’s look at what it takes to get that stainless steel shining again.
Gathering Your Arsenal
You can’t scrub solidified grease with a dish sponge and some soapy water. It just won’t budge. You need heavy artillery. Grease that sits above a fry line or a charbroiler eventually turns into a hard, varnish-like substance. It’s stubborn.
Here is a quick breakdown of what you would typically need to even attempt this:
| The Tool | Why You Need It | The Reality |
|---|---|---|
| Caustic Degreaser | Breaks down organic fats and carbon buildup. | It burns skin on contact. Wear gloves. |
| Hot Water Pressure Washer | Cold water won’t cut grease. You need heat. | Needs to hit 200°F+ to be effective. |
| Plastic Sheeting | To create a funnel for the waste water. | If this leaks, your kitchen floor is ruined. |
See what I mean? It’s a production. And I haven’t even mentioned the Personal Protective Equipment (PPE). Goggles, face shields, rubber gloves, and rain suits are non-negotiable.
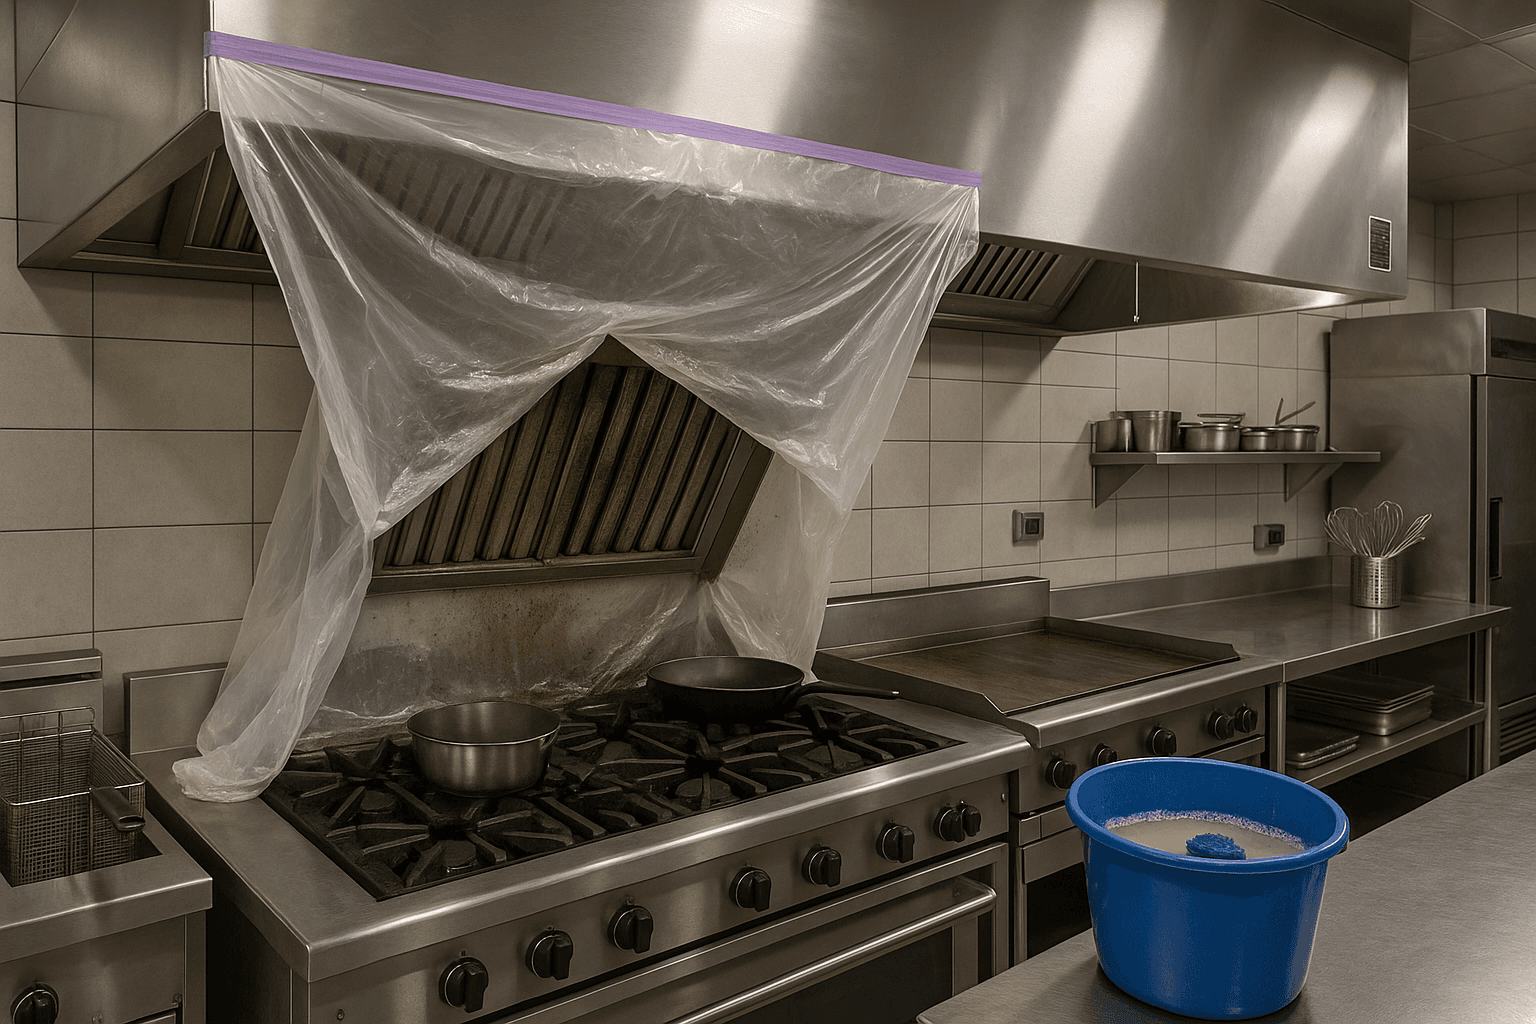
Step 1: The “Kill Room” Prep
Okay, that sounds a bit dramatic, but have you ever seen the show Dexter? You know how he covers everything in plastic? That is essentially what you need to do to your kitchen.
When you start spraying high-pressure water mixed with caustic chemicals into a hood, that black, greasy sludge has to go somewhere. Gravity dictates it’s coming down. If you don’t manage the runoff, it will coat your fryers, your prep tables, and your floors.
You need to turn off all pilot lights and gas valves. Cover the appliances directly under the hood with heavy-duty plastic sheeting. But don’t just drape it; you have to tape it tight. Then, you create a “funnel” effect with the plastic to direct the water into a large garbage can or a collection barrel.
Pro tip: Salt Lake City has strict regulations about wastewater. You cannot just dump grease water down the storm drain. That’s a massive fine waiting to happen. It needs to be disposed of properly, usually via a grease trap or a licensed disposal facility.
Step 2: Taking Down the Filters
The baffle filters are those metal slats that run along the back of the hood. They are the first line of defense, catching the grease before it shoots up into the ductwork. They are also usually heavy and slippery.
Remove them carefully. You don’t want to drop one on a fryer valve—that’s an expensive mistake. Once they are down, they need to soak. A spray down usually isn’t enough. Most people build a “soak tank” using a large bin, hot water, and a strong degreaser. Let them sit there for a few hours while you work on the rest of the system. The chemical reaction needs time to loosen the carbonized grease stuck between the metal blades.
Step 3: Up on the Roof
Here is where things get tricky, and frankly, a bit dangerous. The Exhaust fan is located on the roof. To clean the system properly—to actually be fire code compliant—you must clean the fan and the ductwork from the top down.
If you just clean the shiny part inside the kitchen (the canopy), you are doing what we in the industry call a “hood washing,” not a hood cleaning. It’s cosmetic. The real fire danger lives in the ductwork where you can’t see it.
You have to climb up to the roof. In Utah, depending on the season, that roof is either scorching hot or covered in ice. Once you are up there, you need to take the fan off its curb (or hinge it open if you have a hinge kit installed). You then spray degreaser down the duct and pressure wash the fan blades. Fan blades can get thrown off balance by uneven grease buildup, which causes that annoying rattling sound you might hear in the dining room.
Honestly? This is the part where most DIY attempts fail. It requires long hoses, high pressure, and a lack of fear of heights.
Step 4: The Chemical Scrub
Back in the kitchen, it’s time to tackle the canopy—the part you actually see. By now, you should have applied a chemical sprayer to coat the entire interior of the hood with degreaser.
Let it dwell.
Patience is key here. If you spray and immediately rinse, you’re wasting your time. The chemical needs 10 to 20 minutes to break the molecular bonds of the grease. You’ll see it start to turn into a brown slurry. That’s the money shot.
Once it’s softened, you might need to scrape. Get a paint scraper or a putty knife. Focus on the corners and the rivets. Grease loves to hide in the seams. Be careful not to gouge the stainless steel, though. Stainless steel is tough, but it scratches, and deep scratches can harbor bacteria later on. It’s a delicate balance of brute force and careful touch.
Step 5: The Pressure Rinse
Now comes the noise. Fire up the pressure washer. You want to rinse from the top down, washing all that chemical and loosened grease into your plastic funnel and into the collection bin.
This creates a lot of steam, especially if you’re using hot water (which you should be). It gets humid, hot, and hard to see. It’s messy work. You have to be meticulous. If you leave chemical residue behind, it can drip into food later, which is obviously a health hazard. Or, over time, the leftover chemical can corrode the metal of the hood itself.
Make sure you rinse until the water runs clear. No suds, no brown sludge. Just clean water.
Step 6: The Shine Up
After the rinse, the hood is clean, but it probably looks dull and streaky from the water and chemicals. This is where the aesthetic part comes in. You need to dry it off completely. Towels, squeegees, whatever works.
Then, apply a stainless steel polish. This isn’t just for looks; the polish actually leaves a microscopic barrier that makes it slightly harder for new grease to stick, making the next cleaning a tiny bit easier. Plus, when the health inspector walks in with their flashlight, a shiny hood tells them you care about your kitchen. It sets a tone of cleanliness for the whole establishment.
Put the filters back in (after rinsing them off, of course). Make sure they are seated correctly. If there are gaps, the smoke will bypass the filters and go straight into the duct, which defeats the purpose of having them.
Why “Bare Metal” Matters
I want to circle back to a phrase you might hear professionals use: “Bare Metal Standard.”
When you clean a hood, the goal isn’t just to get the surface grease off. The goal is to remove 100% of the fuel source. That means scrubbing until you see the raw metal of the duct and the fan.
Over time, if you only do a surface clean, layers of grease bake onto the metal, turning into something that looks like black obsidian. It’s hard as a rock. If a fire starts on the stove, the flames can shoot up into the hood. If that rock-hard grease is there, it acts like coal. It burns hot and it burns long. That is how you lose a building.
Achieving bare metal usually requires aggressive chemicals and very hot water, things that are hard to manage without a truck-mounted unit.
The Frequency Question
So, how often do you need to go through this ordeal? It depends on what you are cooking.
If you are running a burger joint or a steakhouse in downtown SLC, using charbroilers and wok ranges, you are generating a ton of grease. NFPA 96 suggests monthly cleanings for solid fuel cooking operations and quarterly for high-volume operations like 24-hour diners or burger places.
If you are a pizza place or a nursing home kitchen doing mostly low-grease cooking, you might get away with every six months or even annually. But don’t guess. Your insurance carrier usually has a specific requirement written into your policy. If you don’t follow it and you have a fire, they might deny the claim. That is a nightmare scenario.
The Hidden Costs of DIY
Here is the thing about doing it yourself—it takes time. A proper hood cleaning takes anywhere from 3 to 5 hours, usually done overnight when the kitchen is closed.
If you are asking your staff to do it, you are paying them overtime. You are paying for the chemicals. You are paying for the equipment rental. And you are assuming the liability if someone falls off a ladder or gets a chemical burn.
Also, consider the mess. If your plastic funnel bursts (and it happens to the best of us), you have 50 gallons of black grease water on your kitchen floor at 2 AM. Do you have a wet vac? Do you have the cleaning supplies to fix that before the morning prep crew comes in at 6 AM?
A Note on Utah Fire Codes
Living in Salt Lake City, we deal with dry air. Things dry out fast here, but grease doesn’t effectively “dry”—it oxidizes. The local fire marshals are pretty strict because they know how fast a fire can spread in our climate. They look for the sticker on the hood.
That sticker is more than just a piece of paper; it’s a certification that a trained technician has cleaned the system according to code. If you clean it yourself, you can’t issue that sticker. You might do a great job, but if the inspector comes in and doesn’t see a current inspection tag, you could still get fined or shut down until it’s verified. It feels unfair, but it’s about liability and standardized safety.
When to Call for Backup
Look, I respect the hustle. If you have a small hood and you are handy, you can keep the canopy looking good between professional cleanings. Wipe it down every night. Run the filters through the dishwasher (if your dishwasher can handle the grease load) weekly.
But for the deep clean—the one that scrapes the fan on the roof and flushes the ductwork—it is almost always better to bring in a crew. We have the truck-mounted pressure washers that heat water to boiling temperatures. We have the specific degreasers that aren’t sold at Home Depot. We have the training to navigate rooftop hazards.
It’s about peace of mind. You want to go to sleep knowing that if a line cook flares up the grill tomorrow, the ventilation system will do its job and pull that heat out, rather than fueling a catastrophe.
Let Us Handle the Grime
Honestly, you have enough on your plate running a restaurant. You’re dealing with food costs, staffing shortages, and customer reviews. You shouldn’t have to worry about climbing on the roof at midnight to scrape grease. Let us do the dirty work so you can focus on the food.
If you are ready to get your kitchen up to code without lifting a finger, give Utah Hood Cleaning a call at 801-853-8155. We know the local codes, we know the inspectors, and we know how to get your hood down to bare metal. Request a Free Quote today and let’s get that kitchen safe and shining.